

Inserting Tables, Images, and Links
This guide shows you how to insert tables, pictures, and links in MobiDocs so you can organise content, add visuals, and connect readers to useful and relevant resources.
Before you begin
Make sure you have:
MobiOffice installed and signed in.
A document open in MobiDocs.
Insert a table
Tables are useful for schedules, comparisons, pricing, and any data with rows and columns.
1. Click where you want the table to appear in your document.
2. In the ribbon, click Insert.
3. Click Table.
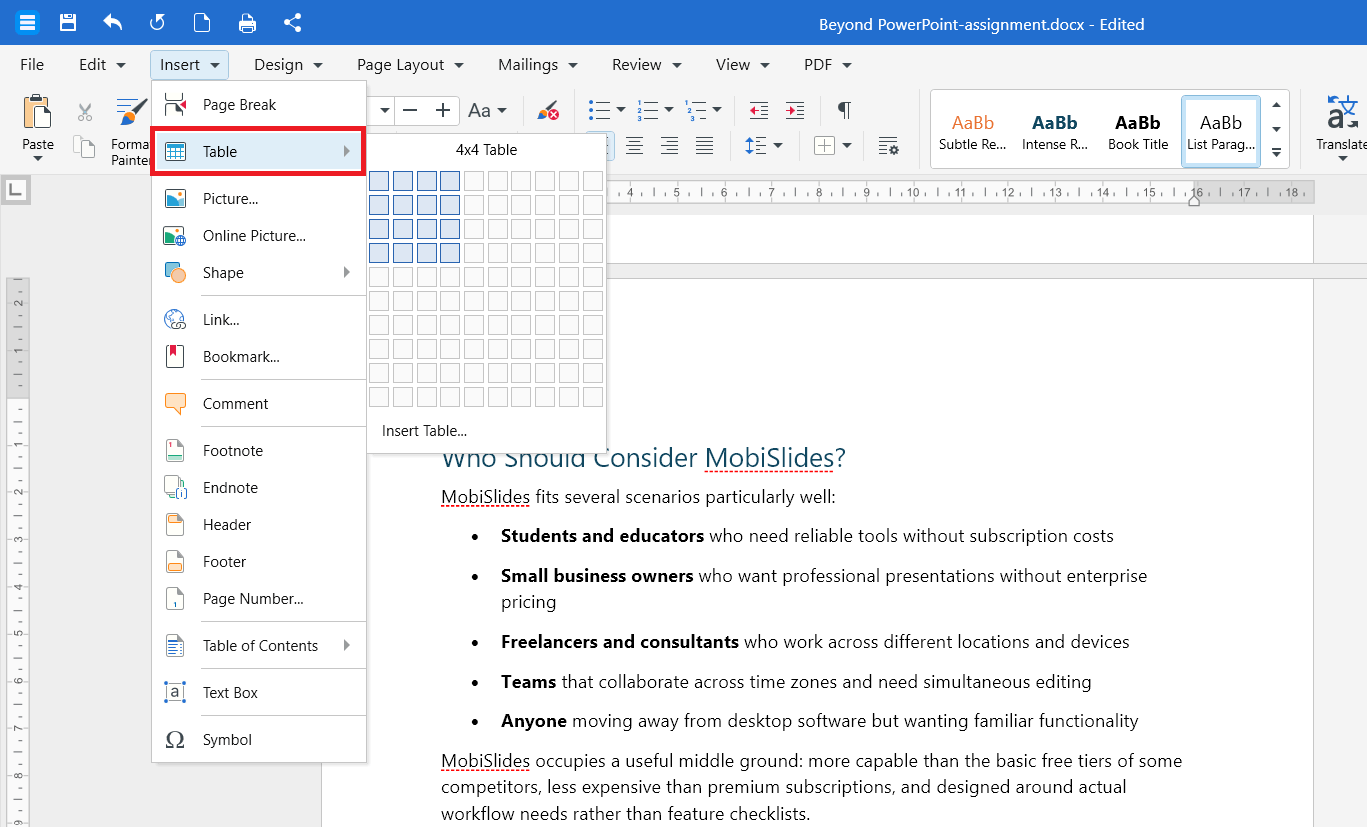
4. Move your cursor over the grid to highlight the number of rows and columns you want.
5. Click to insert the table.
To enter content, click any cell and start typing. Use the Tab key to move to the next cell.
Add a row or column
1. Click inside the table.
2. In the ribbon, click Table.
3. Click Insert and choose where to add the new row or column: Columns Left, Columns Right, Rows Above, or Rows Below.
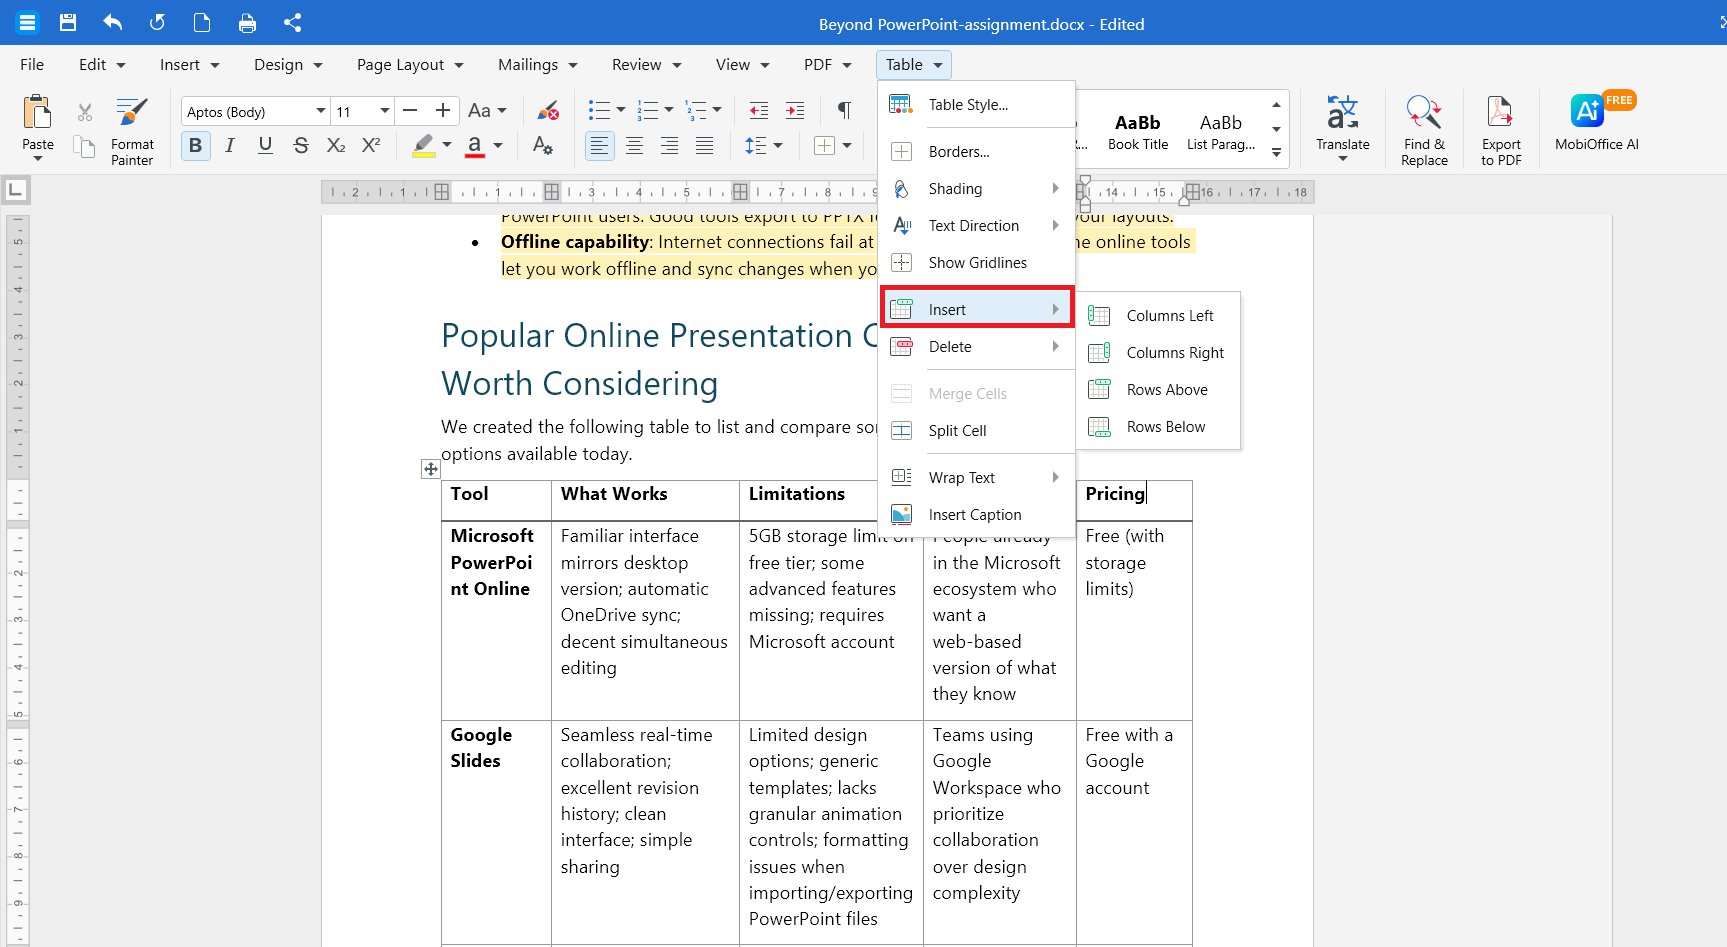
You can also right-click on any cell and select Insert to add a row or column.
Delete a cell, row, column, or table
1. Right-click inside the table.
2. Click Delete and choose what to remove:
Shift cells left or Shift cells up to remove a single cell.
Columns to remove the selected column.
Rows to remove the selected row.
Table to remove the entire table.
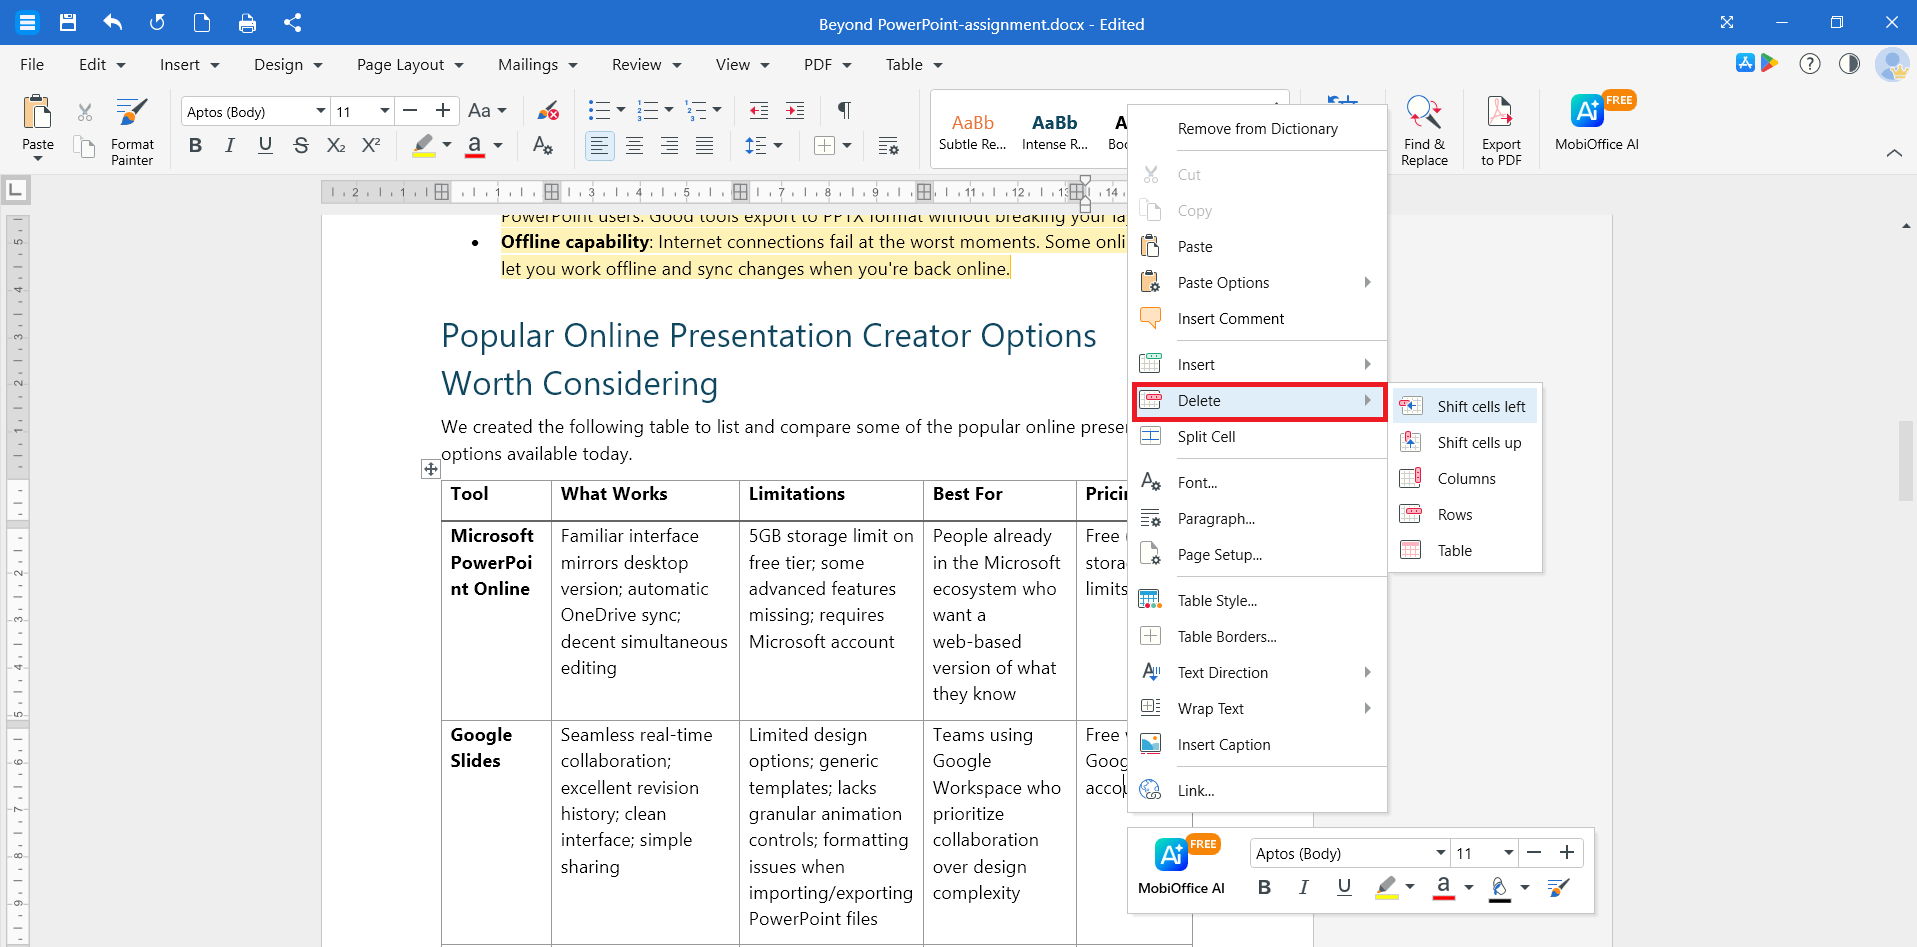
Alternatively, you can click Table > Delete in the ribbon to choose what to remove.
Resize a table
To resize the whole table, drag the handle at the bottom-right corner.
To resize a single row or column, hover over its border until the cursor changes, then click and drag.
Insert an image
You can add images from your device or from the web.
1. Click where you want the image to appear.
2. In the ribbon, click Insert.
3. Click one of the following:
Picture to add an image from your device.
Online Picture to search for an image on the web.
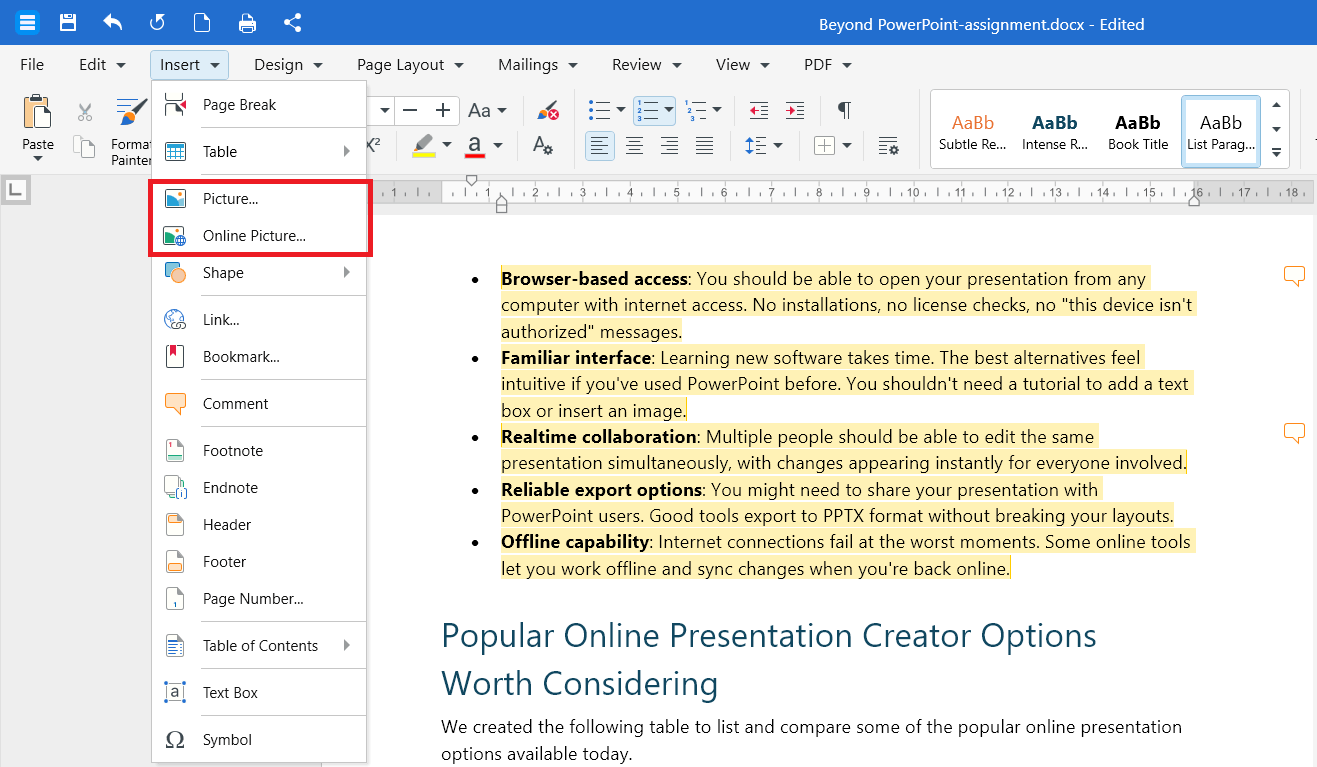
4. Select the image and click Insert.
Resize an image
1. Click the image to select it.
2. Drag a corner handle to make it larger or smaller. Use a corner handle, not a side handle, to keep the proportions.
Wrap text around an image
By default, an image sits in line with your text. To let text flow around it:
1. Right-click the image.
2. Click Wrap Text.
3. Choose a wrapping option such as Square, Tight, or Behind Text.
Move or delete an image
To move an image, click and drag it to a new position.
To delete an image, click it and press Delete.
Insert a hyperlink
Hyperlinks let readers jump to a website, send an email, or jump to a bookmark.
1. Select the text you want to turn into a link.
2. In the ribbon, click Insert.
3. Click Link.
4. In the dialog box, choose the type of link:
URL to link to a website.
Email to open a new email message.
Bookmark to link to a section within the document.
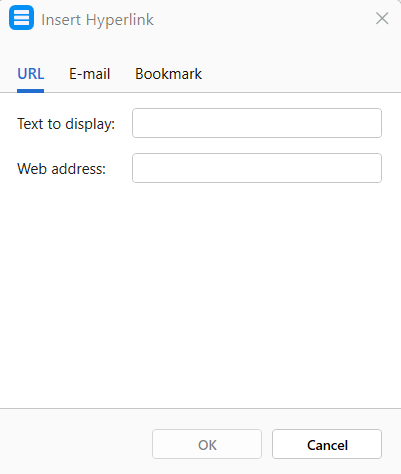
5. Enter the details of the link or email you want to hyperlink to.
6. Optional: Type the text you want readers to see in the Text to display box.
7. Click OK.
Edit or remove a hyperlink
1. Right-click the link.
2. Click one of the following:
Edit link to change the displayed text or the URL.
Remove link to keep the text but remove the link.
Tip: To follow a hyperlink in your document, hold Ctrl (or Cmd on Mac) and click the link.
Insert tables, images, and links on Android or iOS
1. Open your document in the MobiDocs app.
2. Tap where you want to insert the item.
3. Tap Insert in the toolbar.
4. Choose Table, Picture, or Link.
5. Follow the prompts to add and customise the item.
Troubleshooting
My table extends beyond the page. Click inside the table, then drag a column border to make it narrower. You can also reduce the document margins from the Page Layout options.
My image is too large. Click the image and drag a corner handle inward to resize it. Use a corner, not a side, to keep the proportions.
My link doesn't open. Make sure the address starts with http:// or https://. Hold Ctrl (or Cmd on Mac) and click the link to follow it.
The Insert options are greyed out. Click inside the document first. If the document opened in read-only mode, switch to editing mode.
Where to go next
You've added tables, images, and links to your document. Try one of these next:


