

Tips for Creating Professional Documents
In this guide, you'll learn practical tips to make your documents in MobiDocs look polished, consistent, and easy to read. These are small techniques that turn everyday tasks into one-click actions, from applying styles to reusing formatting and adding a table of contents. Use them once you're comfortable with the basics. The steps start with Windows, followed by shorter sections for Mac, Android, and iOS.
Note: A few of the tips below — Format Painter, changing themes, Track Changes, Comments, and Export to PDF — are Premium features. If you're on the Free plan, using them will prompt you to upgrade.
Before you begin
Make sure you have:
MobiOffice installed on your device. See Installing MobiOffice on multiple devices.
A document open in MobiDocs. See Creating and editing documents.
Signed in to MobiDocs. See Signing in to MobiDocs.
An internet connection, if you want to save to the cloud.
Start from a template
Templates give your document a professional structure before you type a single word.
On the Home screen, browse the templates for your particular use.
Choose from the available templates for resumes, cover letters, contracts, and reports.
Click the template you want, then replace the placeholder text with your own content.
Keep the template's layout and spacing so your document stays consistent. See Creating and editing documents.
Use styles instead of manual formatting
Styles keep every heading, title, and body paragraph consistent, and let you restyle the whole document in seconds.
Click inside the paragraph you want to format.
On the ribbon menu, open the Styles gallery.
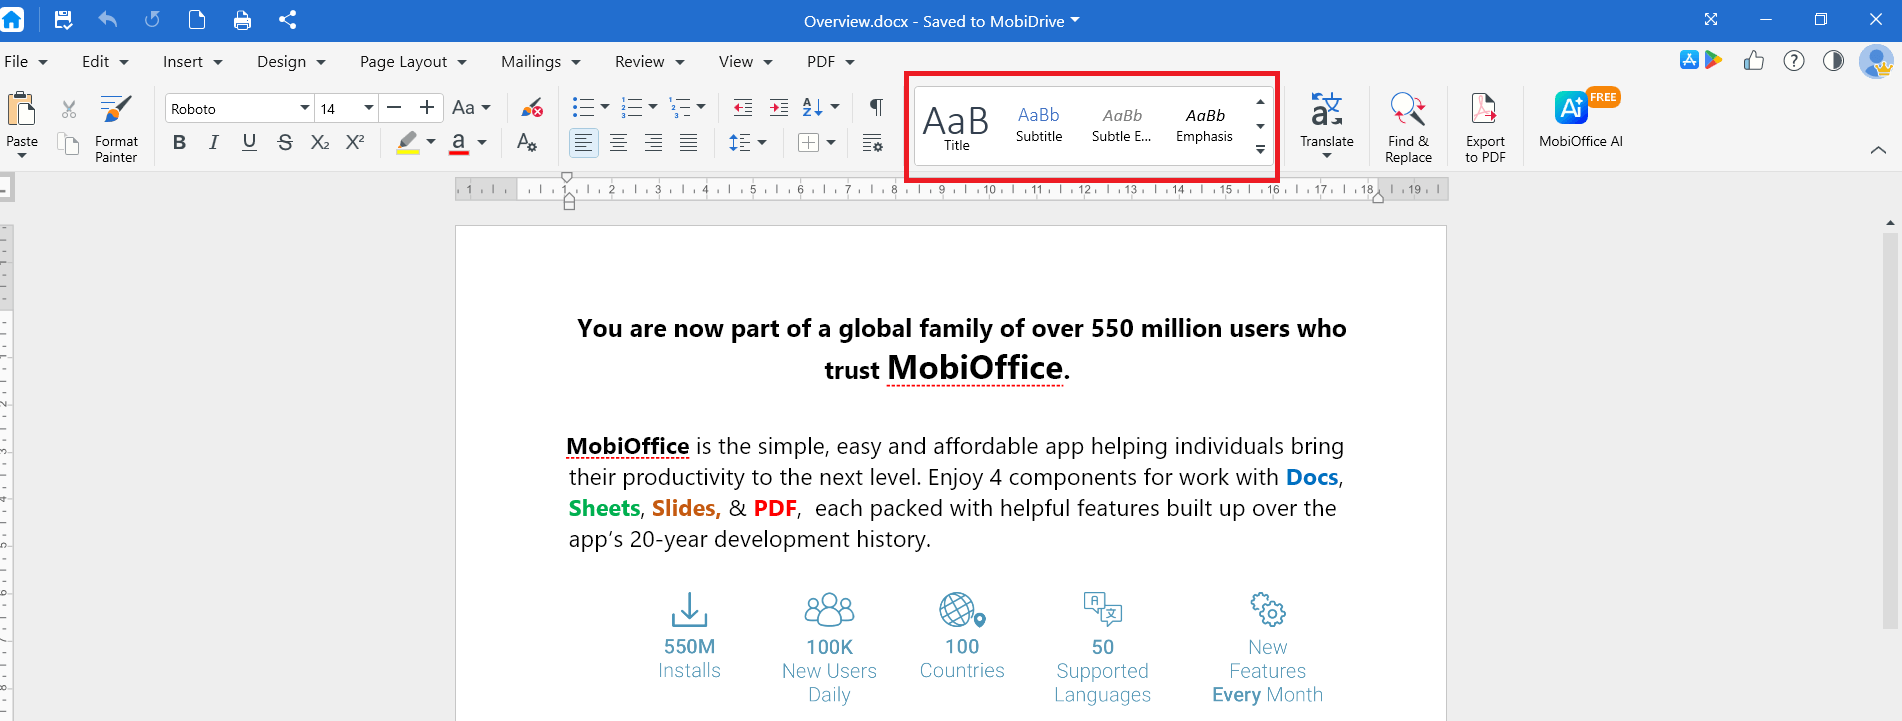
Click a style, such as Heading 1, Heading 2, or Title.
If you change a style later, every paragraph using that style updates automatically. This is faster and more reliable than formatting each heading by hand. See Formatting text and paragraphs.
Reuse formatting with Format Painter
Instead of formatting text one piece at a time, copy the look from one place to another.
Select the text that has the formatting you want.
On the ribbon menu, click Format Painter.
Select the text you want to format.
The font, size, color, and style all transfer in one step. To apply the same formatting in several places, double-click Format Painter, apply it as many times as you need, then press Esc to turn it off.
Apply a theme for a consistent look
A theme sets the fonts and colors for your whole document, so everything matches.
On the ribbon menu, click Design.
Click Themes.
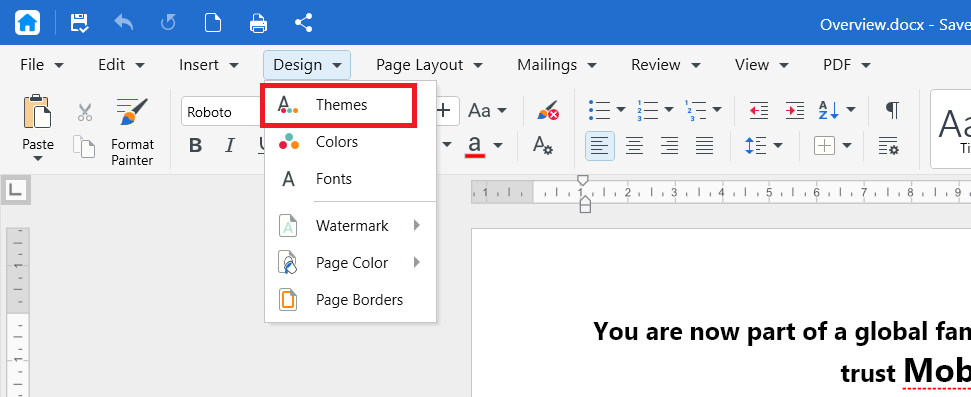
Choose a theme. The fonts and colors update across your document.
Themes work well with styles. Apply styles to your headings first, then switch themes to restyle the whole document at once.
Use keyboard shortcuts to work faster
Keyboard shortcuts save time on actions you do often.
Ctrl+S to save
Ctrl+Z to undo
Ctrl+Y to redo
Ctrl+C to copy
Ctrl+X to cut
Ctrl+V to paste
Ctrl+F to find
Ctrl+H to find and replace
Ctrl+A to select all
Ctrl+B, Ctrl+I, Ctrl+U to apply bold, italic, or underline
On Mac, use Cmd in place of Ctrl.
Keep your fonts simple and portable
Fonts have a big effect on how professional a document looks.
Stick to one or two fonts. Use one font for headings and one for body text.
Use standard fonts if you switch devices. A font that's only on your computer may be replaced with a different one on another device. Standard fonts look the same everywhere.
Set a default font for new documents so you don't have to change it every time. Press Ctrl+D, choose your font and size, then click Set as Default.
Set up a clear page layout
Good layout makes a document easier to follow.
Use consistent margins so text doesn't crowd the edge of the page. See Setting up custom page layouts.
Keep body documents to a single column. Use columns only for newsletters or brochures.
Use section breaks when one part of your document needs a different orientation or margin, instead of forcing the layout with blank lines.
Add headers, footers, and page numbers to longer documents so readers can keep track of where they are.
Add a table of contents to long documents
A table of contents helps readers navigate a long document and updates automatically as you edit.
Apply heading styles such as Heading 1 and Heading 2 to your section titles first.
Click where you want the table of contents to appear, usually near the start.
On the ribbon menu, click Insert, then click Table of Contents.
Choose a style to insert it.
When you add or rename headings, right-click the table of contents and choose Update to refresh it.
Keep tables and images tidy
Tables and images add clarity, but only when they're clean.
Keep tables simple. Use them for data with clear rows and columns, not for general page layout.
Keep column widths even and align the table to the page.
Resize images from a corner handle, not a side handle, so they keep their proportions.
Use text wrapping to position images neatly next to your text.
Use descriptive link text instead of a raw web address. Link the words "download the report" rather than showing the full URL.
See Inserting tables, images, and links.
Refine your writing with the AI assistant
The AI writing assistant helps you tighten and improve your text.
Select the text you want to improve.
Open the AI assistant from the toolbar.
Choose an action, such as: Paraphraser to reword text according to a style (Formal, Standard), or Fix Grammar to fix grammar and spelling.
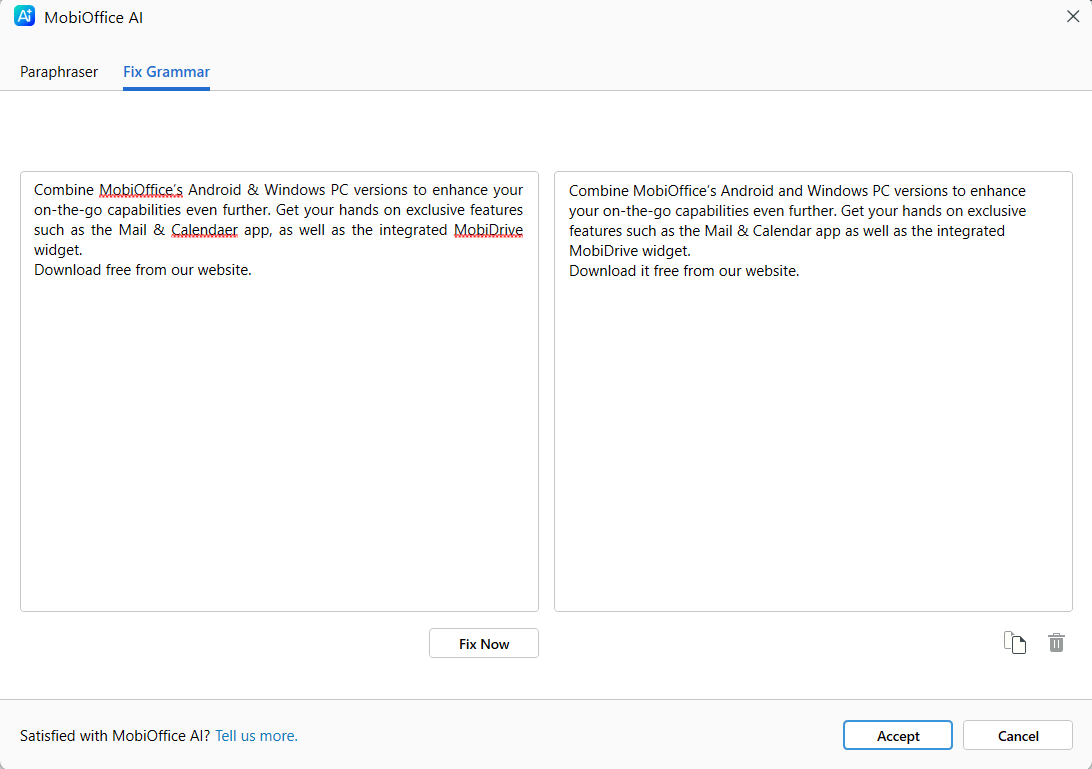
Review the suggestion before you accept it.
Always read AI suggestions before applying them, so the wording still sounds like you.
Update text everywhere with Find and Replace
When you need to change the same word throughout a document, use Find and Replace instead of editing each one.
Press Ctrl+H to open Find and Replace.
In the Find box, type the word or phrase you want to change.
In the Replace box, type the new text.
Click Replace All or click Replace to update one at a time.
This is useful for updating names, dates, or terms that appear many times.
Proofread before you share
Small errors undermine an otherwise professional document.
Turn on Proofing options from the Review menu to ensure that spelling is checked and autocorrect and auto format options are on while you’re writing.
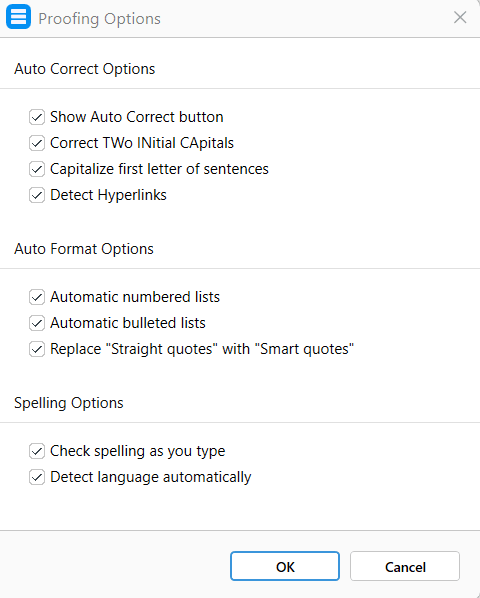
Read your document once with formatting marks hidden, so you see it the way your reader will.
Check that headings, spacing, and fonts are consistent from the first page to the last.
Use review tools for teamwork
When more than one person works on a document, review tools keep changes organized.
Turn on Track Changes so everyone can see what was edited.
Use comments to ask questions or leave feedback without changing the text.
Accept or reject all changes and remove all comments before you send the final version.
Share a clean final version
How you save and send your document affects how it looks to the reader.
Export to PDF when you want the document to look the same on every device and don't need the reader to edit it.
Name your file clearly before you start, such as 2026-Project-Proposal instead of leaving it as Document1.
Save a copy to MobiDrive so you can open the final version from any device.
Tips on Mac
Use Cmd instead of Ctrl for shortcuts, such as Cmd+S to save and Cmd+Z to undo.
Styles, Format Painter, Themes, and the AI assistant work the same way as on Windows, including the same Premium requirements.
Some menu commands are also available from the macOS menu bar at the top of the screen.
Tips on Android and iOS
On phones and tablets, MobiDocs is part of the MobiOffice app.
Tap and hold text to select, copy, cut, or paste.
Apply styles and formatting from the toolbar at the bottom of the screen.
Use the AI assistant from the menu icon to paraphrase or summarize text on the go.
Troubleshooting
My style changes didn't apply. Click inside the paragraph first, or select the text, before choosing a style. A style applies to the whole paragraph your cursor is in.
My table of contents is empty. A table of contents is built from heading styles. Apply Heading 1 and Heading 2 to your section titles, then update the table.
My font looks different on another device. You may have used a font that isn't installed on the other device. Switch to a standard font to keep the look consistent.
My AI assistant isn't available. The AI assistant needs an internet connection and a signed-in account. It also requires a Premium plan. Check both, then try again.
My table of contents didn't update after editing. Right-click the table of contents and choose Update to refresh the page numbers and headings.


