

Setting Up Custom Page Layouts
Page layout controls how your document looks on the page – the margins, orientation, size, columns, text flow, and breaks. This guide shows you how to set up a custom page layout in MobiDocs, whether you're formatting a resume, a newsletter, or a multi-page report.
Before you begin
Make sure you have:
MobiDocs installed and signed in.
A document open in MobiDocs.
Set page margins
Margins are the white space around the edge of your page. Adjusting them changes how much room your text and images have.
1. In the ribbon, click Page Layout.
2. Click Margins.
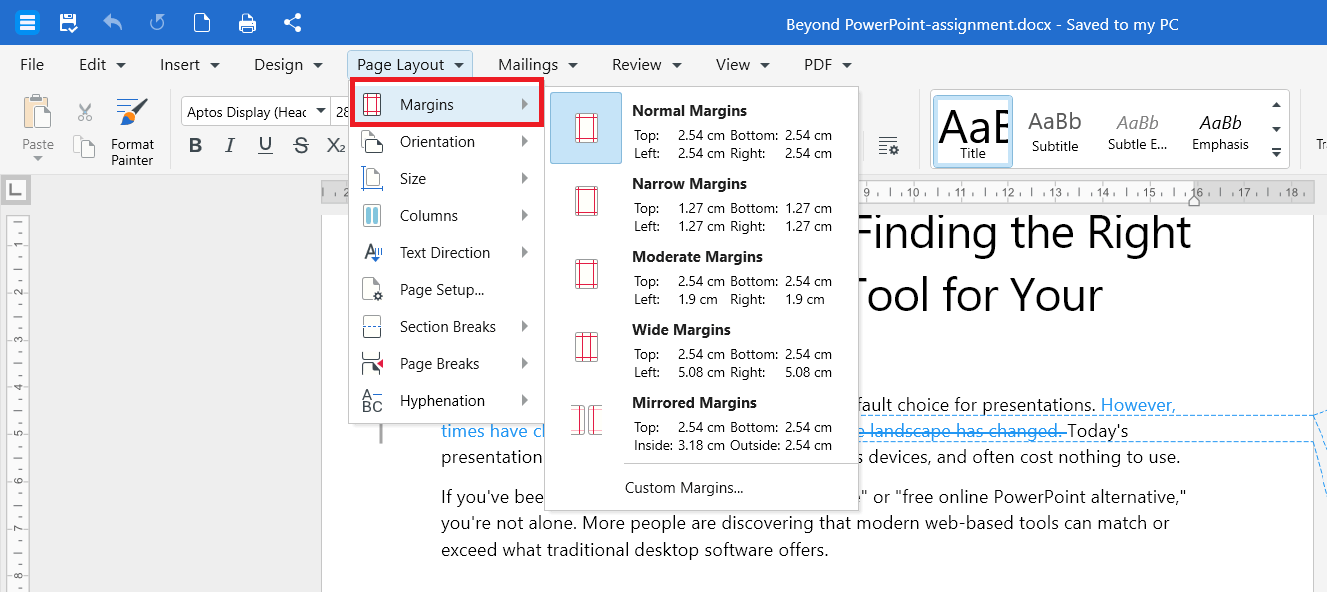
3. Choose one of the preset options: Normal, Narrow, Moderate, Wide, or Mirrored.
To set your own margin values:
1. In the ribbon, click Page Layout.
2. Click Page Setup.
3. In the Margins tab, enter the values you want for Top, Bottom, Left, and Right.
4. Click OK.
Change page orientation
Portrait is the default. Use landscape for wide tables, charts, or designs.
1. In the ribbon, click Page Layout.
2. Click Orientation.
3. Choose Portrait Orientation or Landscape Orientation.
Change page size
Use a different page size for legal documents, posters, or non-standard paper.
1. In the ribbon, click Page Layout.
2. Click Size.
3. Choose a preset such as Letter, Legal, or A4.
To set a custom size:
1. In the ribbon, click Page Layout.
2. Click Page Setup.
3. In the Paper tab, enter your own values for Width and Height.
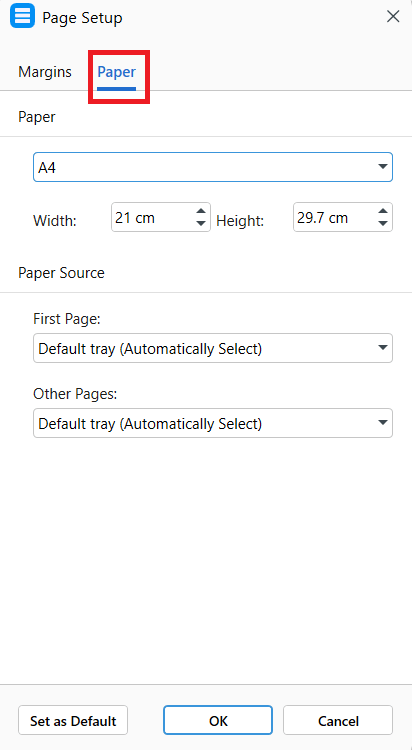
4. Click OK.
Add columns
Columns are useful for newsletters, brochures, and articles.
1. In the ribbon, click Page Layout.
2. Click Columns.
3. Choose the number of columns you want.
To set your own column format:
1. In the ribbon, click Page Layout.
2. Click Columns, then click Columns.
3. Enter the number of columns, the width, and the spacing between columns.
4. Click OK.
Tip: To apply columns to only part of your document, select the text first, then follow the steps above.
Set text direction
Text direction controls how text is oriented on the page. Use it to rotate text for labels, headers, or vertical layouts.
1. In the ribbon, click Page Layout.
2. Click Text Direction.
3. Choose one of the following:
Horizontal to display text in the standard left-to-right direction.
Vertical to display text vertically.
Rotate all text 90° to rotate every character 90 degrees clockwise.
Rotate all text 270° to rotate every character 270 degrees clockwise.
Rotate Asian text 270° to rotate only Asian-language characters 270 degrees while keeping other text in its standard orientation.
Note: The Rotate all text 90° and Rotate all text 270° are only available for text in tables.
Insert a section break
Section breaks let you apply different formatting like different orientations, margins, or columns to different parts of the same document.
1. Click where you want the section to start.
2. In the ribbon, click Page Layout.
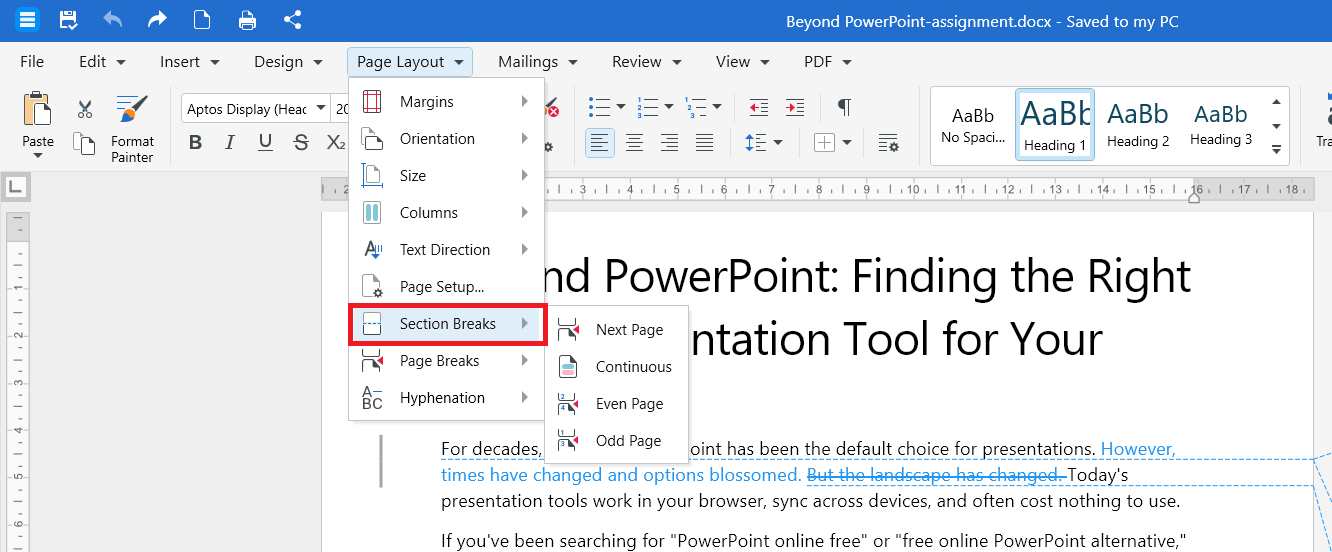
3. Click Section Breaks, then choose one of the following:
Next Page to start the new section on a new page.
Continuous to start the new section on the same page.
Even Page to start the new section on the next even-numbered page.
Odd Page to start the new section on the next odd-numbered page.
To remove a section break, turn on formatting marks, select the section break and press Delete.
Insert a page break
Page breaks control where content flows on the page. MobiDocs offers three types: page breaks, column breaks, and text wrapping breaks.
1. Click where you want the break to appear.
2. In the ribbon, click Page Layout.
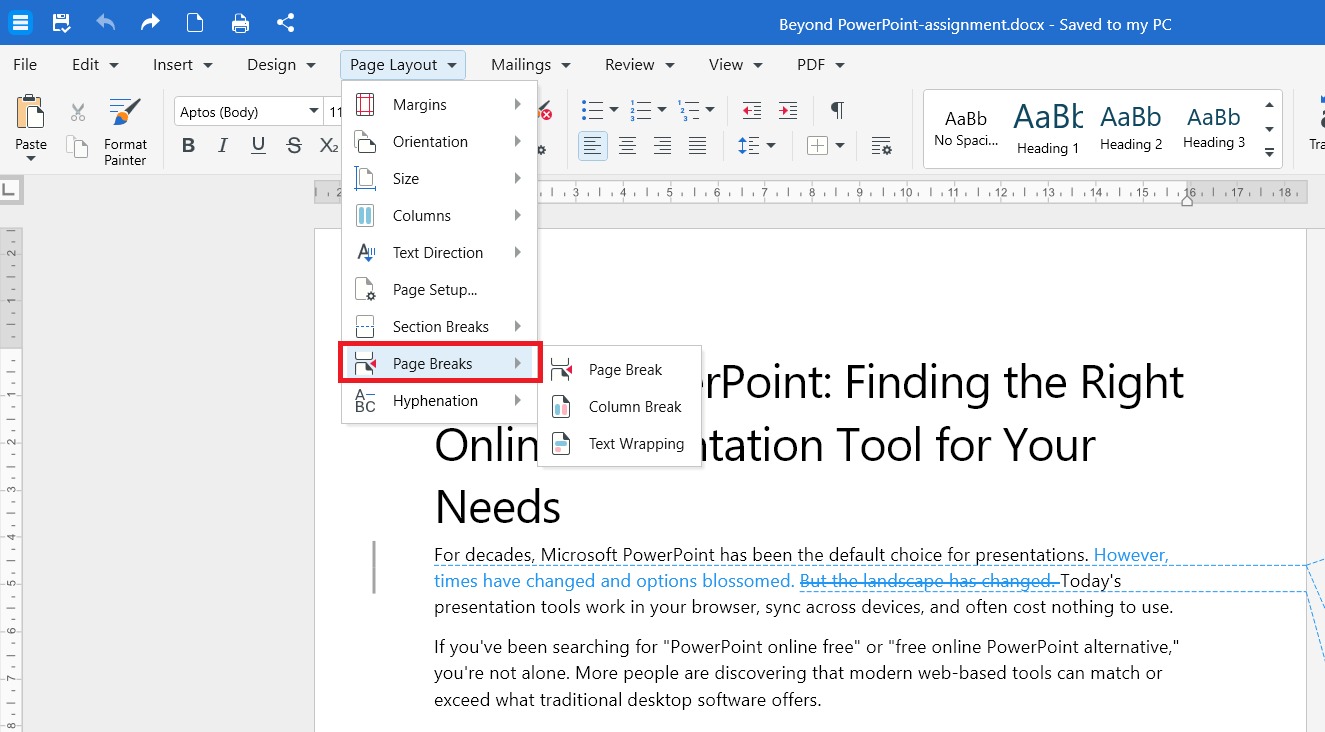
3. Click Page Breaks, then choose one of the following:
Page Break to move the next paragraph to the start of a new page.
Column Break to move the next paragraph to the top of the next column. Use this in documents that have multiple columns.
Text Wrapping to end the current line and continue the text after a wrapped object such as an image or table.
Tip: You can also press Ctrl + Enter (or Cmd + Enter on Mac) to insert a page break.
Set hyphenation
Hyphenation breaks long words at the end of a line. It can make justified text look more even and reduce large gaps between words.
1. In the ribbon, click Page Layout.
2. Click Hyphenation.
3. Choose one of the following:
None to turn off hyphenation.
Automatic to let MobiDocs add hyphens where needed.
Set up page layouts on Android or iOS
1. Open your document in the MobiDocs app.
2. Tap the menu and choose Layout mode.
3. Tap the option you want: Margins, Orientation, Size, Columns, Text Direction, or Breaks.
4. Adjust the settings and confirm your changes.
Troubleshooting
My columns look uneven. Open Page Layout > Columns > Columns and clear the Equal column width checkbox to set custom widths or check it to make them the same.
Page break won't move. A page break is a single character. Select it and press Backspace to remove it.
I can't find the section break I want to delete. Turn on formatting marks to see hidden characters, including section and page breaks. You can then select the break and press Delete.
Hyphenation isn't working. Hyphenation depends on the language of your text. Make sure the correct proofing language is selected for the paragraph.
Where to go next
You've set up your page layout. Try one of these next:


